Fall is Container Tree Planting Season
A Chinese proverb says “The best time to plant a tree was twenty years ago. The next best time is now.” Trees shade your home, beautify the landscape, prevent soil erosion and increase property values. It takes many years for a tree to mature, so planting a tree now is a long-term investment in your home, community and environment.
Planting the tree in the fall and early winter will give the tree a better chance to thrive on your property as it will have the winter for the roots to become established before the growing season. Balled and burlapped and container trees are usually available from local plant nurseries in the fall. These trees are sold with the roots growing in soil. The nursery packaging of the root zones of these plants varies and can be a root ball tied in burlap (balled and burlapped), a balled and burlapped tree in a container with topsoil, or a root ball in a container. The entire root ball is planted, including the soil. The root ball must be freed from its nursery packaging before planting to allow the roots to properly anchor the tree in the surrounding soil as the tree grows.
Planting of bare root trees will be discussed in a winter NW Treebune blog post, as most bare root specimens are not available until that time.
Before You Dig
In addition to choosing the best tree for the planting site conditions, keep in mind the final spread of the mature tree canopy and plant the tree half of the expected canopy diameter away from any structures. Remember to locate your utilities before you dig.
Preparing For Planting
Dig a hole twice the width of the container and a depth of the root ball measured from the root collar.
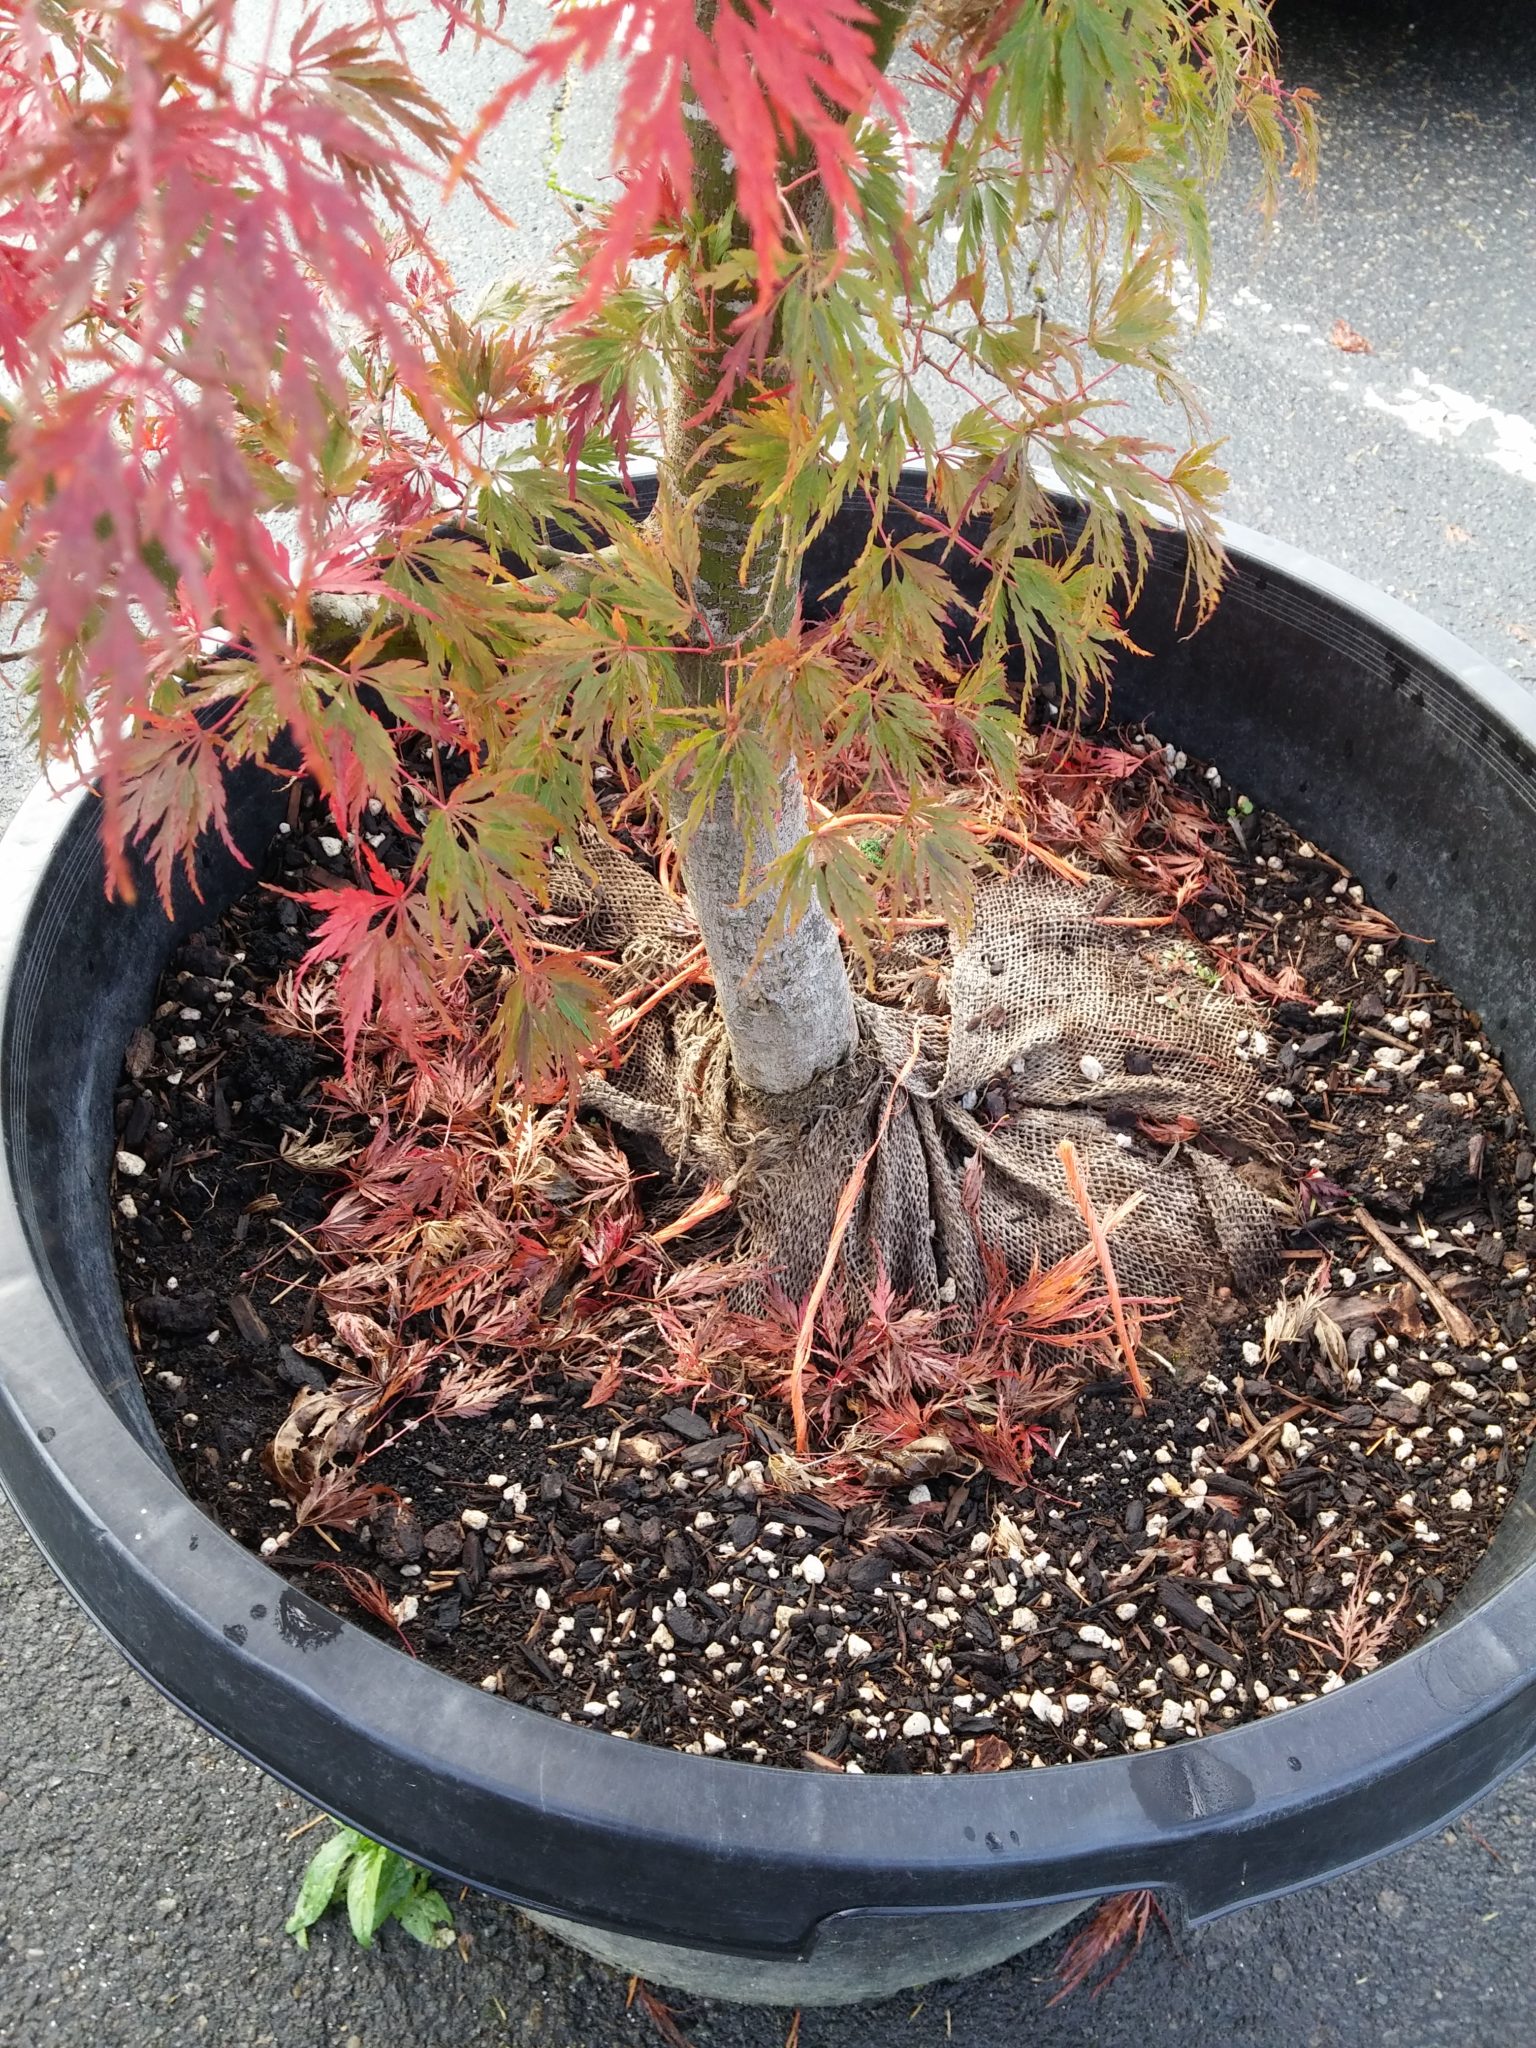
If the tree is in a container, tap the container around the sides to loosen the soil and carefully remove the tree and root ball from the container while supporting the weight of the root ball. As seen in the above photograph, many nursery trees are sold in containers housing a burlapped root ball with a thin layer of top soil covering the root ball. This topsoil can sometimes disguise the burlap, so look carefully.
If the root ball is enveloped in burlap, remove all hardware holding the burlap in place whether it’s a wire cage or twine. Take care to prevent root ball soil crumbling or root damage. Peel the burlap down and off entirely and discard. If many roots have penetrated the burlap, peel it down at least half the height of the root ball and cut off the excess burlap. Gently loosen any roots encircling the root ball or cut the worst offenders with hand pruners. If any roots are torn or damaged, use hand pruners to make a clean cut rather than leaving frayed or torn roots.
Plant, Mulch, and Water
Place the root ball in the prepared hole, ensuring that the root collar is just slightly above the surrounding soil level. Backfill the hole with the removed soil, firming the soil with your hands as you work. Apply 2-4 inches of mulch (or arborist wood chips) over the planting site. If practical, spread mulch out to the edge of the canopy or further, but be sure the mulch or soil is not in direct contact with the trunk or root collar. Water the newly planted tree deeply at the time of planting and as frequently as necessary thereafter to prevent the roots from drying out until the winter rains set in.
Once the rains cease in the summer, give your newly planted trees deep waterings throughout the dry season for the first few summers of their lives to prevent drought stress.
Following the steps above for proper planting of balled and burlapped and container trees will improve your tree’s chance of surviving to maturity.


